Guide to Installing Your New Gas Cooktop
Installing a new gas cooktop brings exciting new cooking possibilities, but the process requires careful planning and adherence to safety standards. Here in Blacktown, Sydney, the team at Blacktown Plumbing has years of expertise fitting and connecting gas appliances according to Australian regulations.
Before installing your new cooktop, take into account the layout of your kitchen, space availability, and existing gas connections. You may need modifications like a new countertop cutout, gas line with shutoff valve, and grounded electrical outlet. Post-installation, verify there are no gas leaks and maintain the stipulated clearance from combustible materials as outlined in the cooktop’s manual.
Always engage a fully licensed gas fitter to ensure your cooktop can be installed professionally.
With some handy DIY skills and guidance from Blacktown Plumbing, achieving that perfect cooktop fit can be a seamless addition providing exceptional cooking performance. Contact us if you need assistance with your gas range planning or executing this critical kitchen upgrade.
Strategic Preparations for Cooktop Installation
Efficient integration with existing gas connections demands meticulous planning when fitting gas cooktops. First, assess your kitchen layout and available space to determine the best location.
Ensure you have an existing 1⁄2-inch rigid gas port with shutoff valve terminating in the desired location for your cooktop. You’ll need a properly grounded 240V electrical power point positioned no higher than 12 inches above where the back of the cooktop will rest.
Cooktops typically measure between 53 and 61 centimeters in depth, with these dimensions critical for ventilation and accessibility.
Maintain a safe distance of 76 to 91 centimeters between the cooktop and the range hood. Consult the installation manual, frequently sold at home centers, to verify all clearance requirements from combustibles like cabinets. Ensure the countertop cutout matches your cooktop model’s specifications, usually about 71 x 86 centimeters.
Once you’ve got an appropriate spot selected, even if it was for electric models, It’s wise to consult Blacktown Plumbing to evaluate your planned modifications for appropriate gas cooktops. Our qualified gas fitters can fit the essential, correctly rated and compliant connections for your new cooktop. We’re here to help with every planning and installation step.
Selecting the Right Cooktop Model and Size
Ensure you choose a gas cooktop with a width—either 76 or 91 centimeters—that accommodates your designated space effectively.
Consider the necessity of a wok burner and how many other burners you need based on your cooking habits. Optimal clearance between burners is at least 3 inches.
Match your gas stove size to your range hood, considering the installation your space will accommodate. An undersized hood won’t effectively ventilate a large cooktop. Prioritise models with front controls and measure your unit to ensure the knobs won’t overlap your backsplash or cabinets when opened.
Verify cooker burner BTU ratings are compatible with your current rigid gas line and service capacity. If your home infrastructure requires modifications to support the new cooktop, The professionals at your local gas experts, Blacktown Plumbing, can perform necessary gas fitting work to ensure safe, leak-free installation.
Ensuring Proper Electrical and Gas Connections
A 240V electrical connection is needed for the ignition system of the cooktop; use a grounded outlet not more than 30 centimeters above the cooktop’s rear edge. This powers the spark igniters for each burner.
Ensure a rigid gas supply line, approximately 1.27 centimeters in diameter, is installed to meet your cooktop’s burner requirements. Ensure it’s properly sized to provide adequate BTUs for all burner elements on the cooktop, especially if using natural gas, per the manufacturer guidelines. This dedicated gas shutoff should be installed in an easily accessible location, like an adjacent cabinet.
Modifying electrical circuits or gas lines carries safety risks and requires a licensed gas fitter for professional work in most areas. The experts at Blacktown Plumbing specialise in gas stove installation services to ensure your new cooktop is compliant, leak-free and operating safely.
Preparing the Countertop and Cabinetry
When learning how your new cooktop fit optimises your space, proper sizing of the countertop cutout is crucial. Consult the installation manual for precise cutout dimensions.
Use a sharp jigsaw that can cut the opening, following marked cut lines carefully. You can use countertop materials that withstand heat; solid surfacing products often work best. Maintain 1/8 inch clearance on each side of the cooktop edges and cutout to ensure safe spacing.
Secure with brackets and adhesive tape if needed.
The area underneath must have 18-20 inches clearance between the cooktop and combustibles such as base cabinets or drawers. If your existing space doesn’t accommodate, apply millboard or other non-combustible material to surfaces below. Never store items in this safety zone.
Professional installation by Blacktown Plumbing guarantees the safe and correct integration of your gas stove into your kitchen’s existing setup.
Conducting the Installation
When conducting the actual installation of your new gas cooktop, safety should be the top priority. Strictly follow the manufacturer’s guidelines in the manual for mounting procedures. Always use safety glasses and work gloves to protect yourself.
Gently place your gas cooktop into the cutout, following the manufacturer’s instructions for aligning brackets or screws. Connect gas and electrical lines securely, ensuring the screw connector and all fittings are tightened properly with pipe sealant applied to prevent leaks. Test with a soapy water solution after turning the gas supply back on.
If bubbles form, immediately switch off the gas cock and inspect the connections again for safety. Contact Blacktown Plumbing immediately if you cannot seal any leaks properly yourself. Please note, never operate an appliance with a known gas leak!
We recommend enlisting Blacktown Plumbing’s professional services for legal compliance, safety checks, and certification during installation. Our adept team ensures proper removal of old cooktops and accurate installation of new appliances on the first attempt. Our services also include safe disposal of your old gas cooktop and upgrades to kitchen infrastructure as needed.
Securing the Cooktop in Place
After lowering the gas cooktop into the cutout, securely fasten it to your countertop using the provided brackets and screws. Refer to the installation manual for the manufacturer’s recommended method. Typically, brackets hook over the edges of the cooktop and screws fix it firmly from underneath.
Ensure the end connector fitting and screws are tightened properly to eliminate any side-to-side movement or instability. Yet, use caution to prevent overtightening and potential damage to the countertop. There should be no space between the cooktop edges and cutout sides.
If the cooktop does not sit flush and snug within the opening, check for proper alignment before securing further. Shim as needed to prevent rocking. Proper installation with right angle pipe ensures your appliance remains stable, preventing potential gas line stresses or disconnects.
Opt for Blacktown Plumbing’s skilled technicians to handle mounting, ensuring your new gas cooktop is seamlessly integrated into your countertop.
Connecting the Gas Line
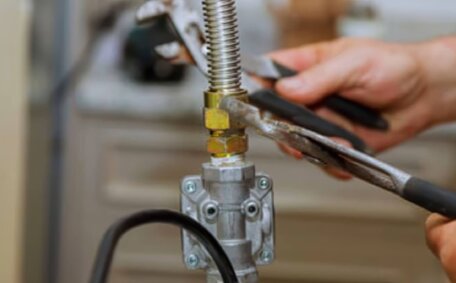
After your cooktop is securely in place, connect the gas line using a half-inch stainless steel connector with the appropriate fittings to the appliance’s gas inlet.
Ensure the orientation allows the black gas pipe to avoid kinks or tension.
Before making connections, always use teflon tape on the threaded ends of the gas line and fittings. Employ a pipejoint compound approved for natural gas connections as an added safety measure.
Wrap the gas connection in the direction of the threads, ensuring full coverage to prevent leaks. Securely fasten each joint with the correct wrench size for the end fitting, but avoid overtightening to prevent damage.
Always confirm an angle pipe with a gas cock exists within 3 feet of the cooktop for emergencies. Slowly turn on the gas and check for leaks using a soapy water solution on all connector gas points and fittings. If bubbles appear, immediately shut off gas and recheck the line. Never operate an appliance with a known leak - call Blacktown Plumbing!
Testing for Gas Leaks and Ignition
After installing the gas line and securing the cooktop, carefully check for potential gas leaks. Ensure all control knobs are turned off on your water heater and slowly engage the line shutoff valve. Utilise a non-corrosive leak detector solution, typically a mix of water and soap, around the gas line, valves, and fittings.
Look closely for any bubbles forming, which indicates gas escaping. Tighten any leaking fittings with an adjustable wrench then recheck with the solution. Should leaks persist, turn off the gas supply and call your local gas company, Blacktown Plumbing, immediately for assistance.
Once all connections are confirmed leak-free, it’s time to test your appliance’s ignition.
Verify a consistent blue flame at the front edge before checking all other burners. Check flame stability by turning knobs rapidly from high to low. If any issues with your oven occur, troubleshoot per manufacturer instructions or contact Blacktown Plumbing.
Allow the cooktop to operate for at least 10 minutes and retest connections for leaks while burners are on. Properly installed and safety-checked gas appliances operate smoothly for years, but regular inspections help identify when fittings need replacement.
Final Checks and Clean Up
After installation completion, ensure you check your gas stove is securely fastened and perfectly level within the countertop. Ensure all gas fitting line and electrical line couplings are tightened properly. Verify the flexible gas hose has no kinks and connects freely without pulls or tension.
Test the ignition of each burner, modifying the flame intensity from maximum to minimum settings.
Burners should ignite promptly and flames should be blue in colour, stable, and evenly distributed. Reignite each burner and check below with a mirror that connections show no signs of leaks.
Clean the cooktop to remove dust or debris and ensure it’s in pristine condition before initial use. Examine the manufacturer’s manual to cross-check that the installation has been completed correctly.
Keep copies of your receipts and our contact information handy, especially if you’re transferring ownership of the property. Contact us with any inquiries or concerns to guarantee the safe operation of your new gas cooktop over time.