What is gas line pressure testing and why it matters
Gas line pressure testing is conducted to verify the containment capability of gas pipes, ensuring safety from leaks. If pressure testing reveals any faults in the gas line such as cracks or loose fittings, it could potentially lead to a dangerous gas leak or even explosions.
The standard pressure rate for residential gas is around 4 ounces per square inch, which is regularly tested for accuracy.
A psi test is conducted when installing a new gas line or making extensive modifications to an existing system. Pressure testing gas lines determines whether the piping can withstand the specified amount gas pressure and allowable leakage rates according to AS/NZS 5601.1 safety standards. Essentially, it verifies the gas system’s ability to function properly and prevent hazardous situations.
The line undergoes monitoring for pressure drops throughout the test period.
If pressure drops beyond permissible levels, it can cause concerns as it indicates a leak that must be addressed before the system can safely provide gas supply. In gas line testing, the line is filled with air, nitrogen, or inert gas at high pressures.
Conducting pressure tests on gas lines is a critical step for ensuring system safety and integrity.
Checking for gas leaks: Allowable pressure drops
AS/NZS 5601.1 standards state that new gas installations must not have an overall pressure drop less than 10% during testing. Pressure drops exceeding this threshold signal gas leaks that necessitate repair.
During a test, if a gas pipe section registers a pressure drop exceeding 10 kPa from an initial 100 kPa, it’s considered unacceptable. A drop of 15 kPa or more indicates a leak beyond allowable limits. Technicians then use leak detection equipment to identify and rectify the exact location of leaks before completing a successful pressure test.
For existing gas systems, pressure drops should be less than 3 psig at connections to appliances, with further details available on our website. But pressure loss should not surpass limits for the overall system as per manufacturer guidelines. Excessive individual appliance pressure drops can also point to faults needing repair.
Adhering to permitted pressure reductions ensures safe and optimal operation of any new piping network. A passed test offers peace of mind that appliances are operating at the correct working pressure and as intended without risk of hazardous leaks over time.
Step-by-step guide to pressure testing a gas line
Pressure testing is crucial for verifying the integrity of gas lines, ensuring gas is delivered safely and effectively. Here is a step-by-step overview of the key stages involved in testing gas line integrity:
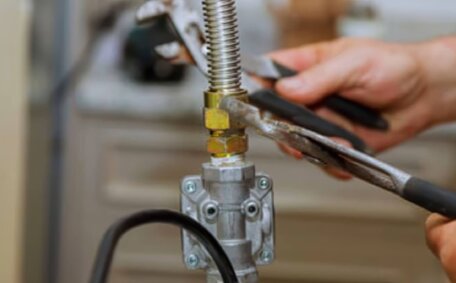
- Prepare the line being tested - Ensure all outlets are properly capped off and that the test pressure shall be maintained throughout the sealed piping network. Install a test gauge, regulator and means of pressurisation such as an air pump.
- Build and monitor pressure - Gradually raise the air pressure to the specified level, not exceeding 100 kPa for low-pressure gas lines. Higher pressure networks undergo water testing up to 1950 kPa.
- Monitor status - Watch pressure gauges to check for any drop in pressure over the duration as per AS/NZS 5601.1, normally 15 minutes. A drop over 10% undoubtedly signifies a leak.
- Leak detection - Should the pressure drop significantly, apply leak detection fluid, utilise manometers, or gas detectors to locate leaks exactly.
- Repair faults - Address all identified leaks including any tight seals you are going put in place such as loose joints or cracks. Reseal and retest if repairing welds or applying sealants.
- Pass test - When pressure loss over time stabilises within allowable limits, the system has passed testing.
Gas can be safely introduced at the operating pressure, smoothly transitioning the system from testing to regular use. Periodic retesting provides ongoing verification of pipe network integrity.
Interpreting pressure test results
Interpreting pressure test results involves ensuring that pressure measurements remain within safe limits. Pressure should stay stable, without significant fluctuations beyond the prescribed safe range.
Standards dictate that pressure loss should not surpass 10% over a duration of 15 minutes for new installations. Higher drops indicate a leak requiring repairs.
Securing fittings or replacing sections prone to leaks is often required for passing the tests.
The line is then retested to verify pressure consistency.
Pressure tests require expertise, with a fundamental rule: stable pressure indicates a gas-tight system. Fluctuating pressure points to leaks needing attention for the line to safely operate. A system certified airtight through pressure testing ensures smooth and safe gas delivery to all property outlets.
When to call a professional
It is vital to contact a licenced professional gas fitter in scenarios such as:
- When installing new gas lines or appliances
- If planning major renovations requiring pipework changes
- To conduct routine gas line integrity checks every 2 years
- If you smell gas or suspect a leak
- When pressure testing reveals abnormal drops exceeding 10%
- If appliances display issues indicating insufficient gas flow
Some gas systems, like those for water heaters, have complex pressurised components. DIY attempts without the necessary expertise risk causing gas leaks, explosions, or carbon monoxide poisoning. Our qualified technicians employ advanced techniques to evaluate gas pipelines, perform tests, identify and repair faults, ensuring safety.
Our team uses cutting-edge diagnostic technology and draws upon extensive hands-on experience for tasks ranging from gas cooktop installation to emergency leak investigation. Rely on our qualified team for professional gas system management and your family’s safety.
Tips for accurate and safe testing
Here are some vital tips to ensure gas line pressure testing is conducted accurately and safely:
- Shut off all gas appliances and pilot lights before testing begins.
- Conduct tests only with certified equipment meeting Australian standards.
- Choose low-pressure pneumatic testing for residential gas lines, not exceeding 100 kPa.
- Perform tests only when the temperature is steady to avoid false gauge readings.
- Cap all outlets and seal the piping network completely before building pressure.
- Monitor gauges constantly during the entire test duration.
- Mark exact leak locations if pressure drops occur and make repairs.
- Adhere strictly to the gas code and safety regulations for your region.
- Ensure the line holds pressure consistently for the pass duration before reconnecting gas.
- It’s advisable to schedule retesting every 2 years to account for potential shifts in building structure and aging pipes.